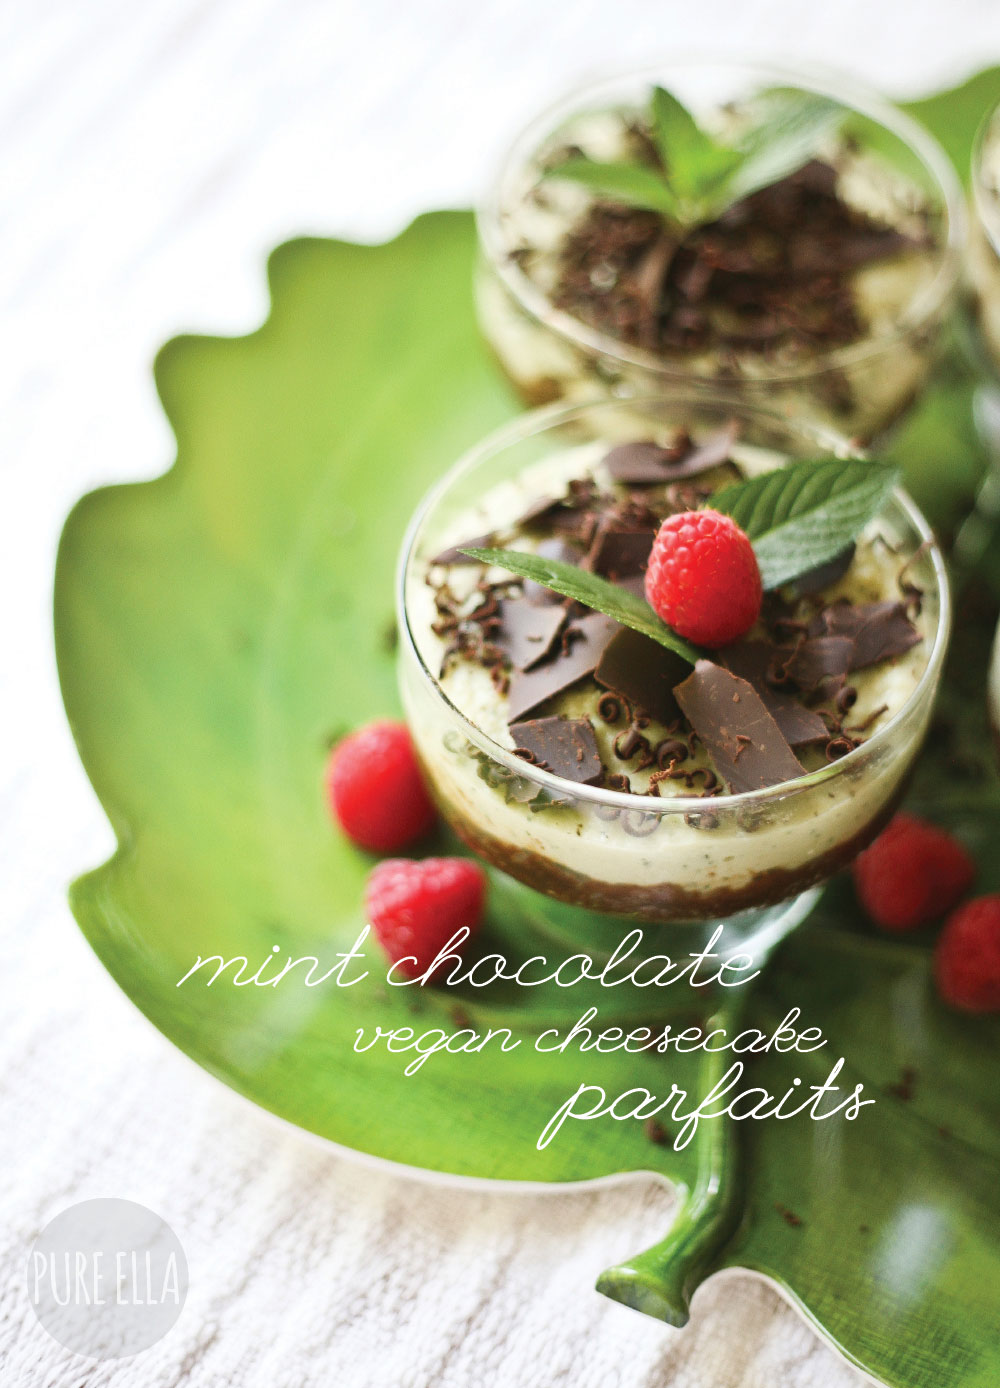
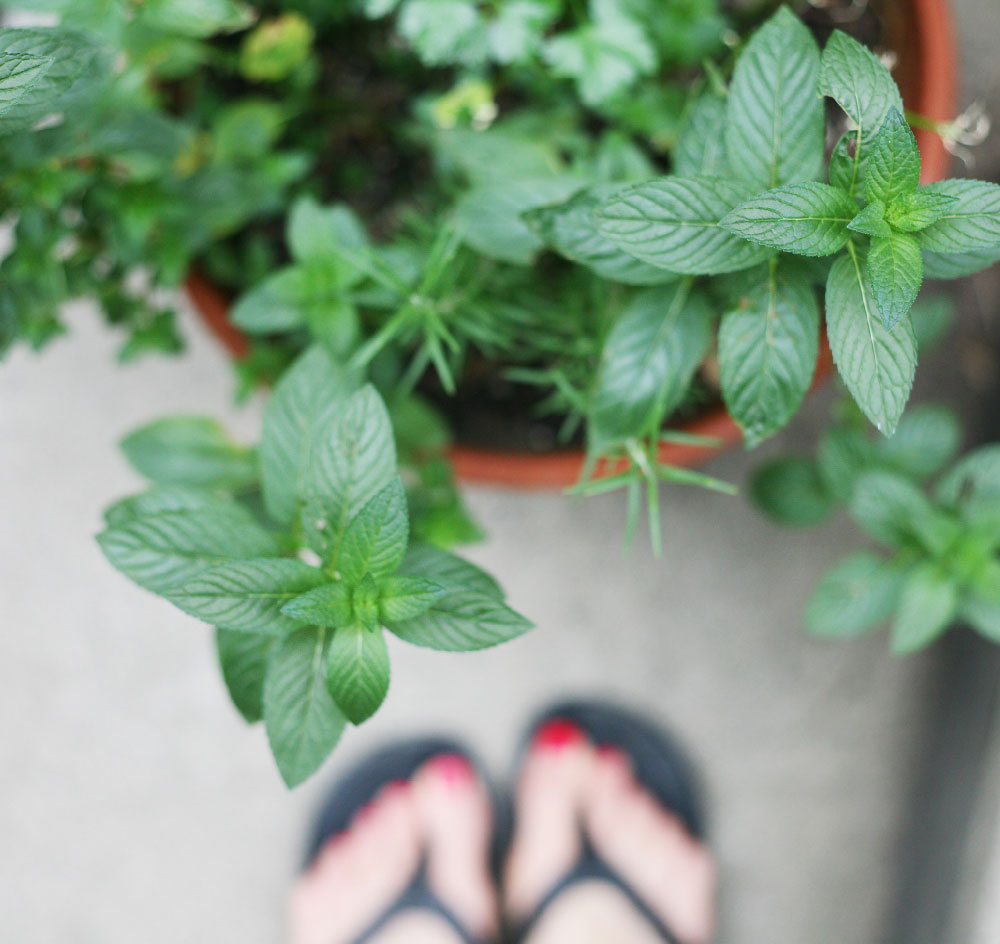
Ahh… when you take a whiff of fresh mint growing in your own herb garden… your mind can’t help but wander… hypnotized by the scent…. Your own senses just guide you and inspirations come over and you know you want to eat it up but how? Fresh mint is one of the most wonderful herbs on the planet, I think! That’s because I’ve always been a big fan of mint tea and chocolate-chip ice cream was always (and often still is) in our freezer all the time. I often liked a little sprig of fresh mint for decorating other desserts… but I have not yet done a dessert solely based on the mint as the main ingredient! The thought – brilliant! The process – surprisingly easy and quick! The result – pure happiness!
Of course, fresh mint leaves can be picked up year round – thank goodness! So there’s really no reason to wait to make this dessert. It’s amazingly healthy too with no sugar added, gluten/ grain free and completely dairy/ egg/ vegan. And naturally coloured with the light green colour hint from the fresh mint – please watch out for food colouring – it’s mostly very toxic and terrible for you.
Always choose natural food colouring and avoid store bought desserts at all times that are loaded with sprinkles or coated in coloured icing – I don’t know how people give this *crap* to their kids! (that’s changing the topic there… sorry about that, but clearly I have a lot of issues with what’s on the store shelves!) ;)
My friends, this is easier than you think! You can eat healthy desserts and enjoy simple no-bake cheesecake that tastes unbelievable! Knowing that clean beautiful ingredients went into your dessert make it that much good for your senses and your body….. The inspiration comes from my friend Heather’s Mint Chocolate Tart. Here is my slightly-simplified version of it you’ve all been waiting for :
MINT CHOCOLATE CHEESECAKE PARFAITS
{raw, vegan, grain free/ gluten-free, dairy and egg free, no-bake, no sugar added}
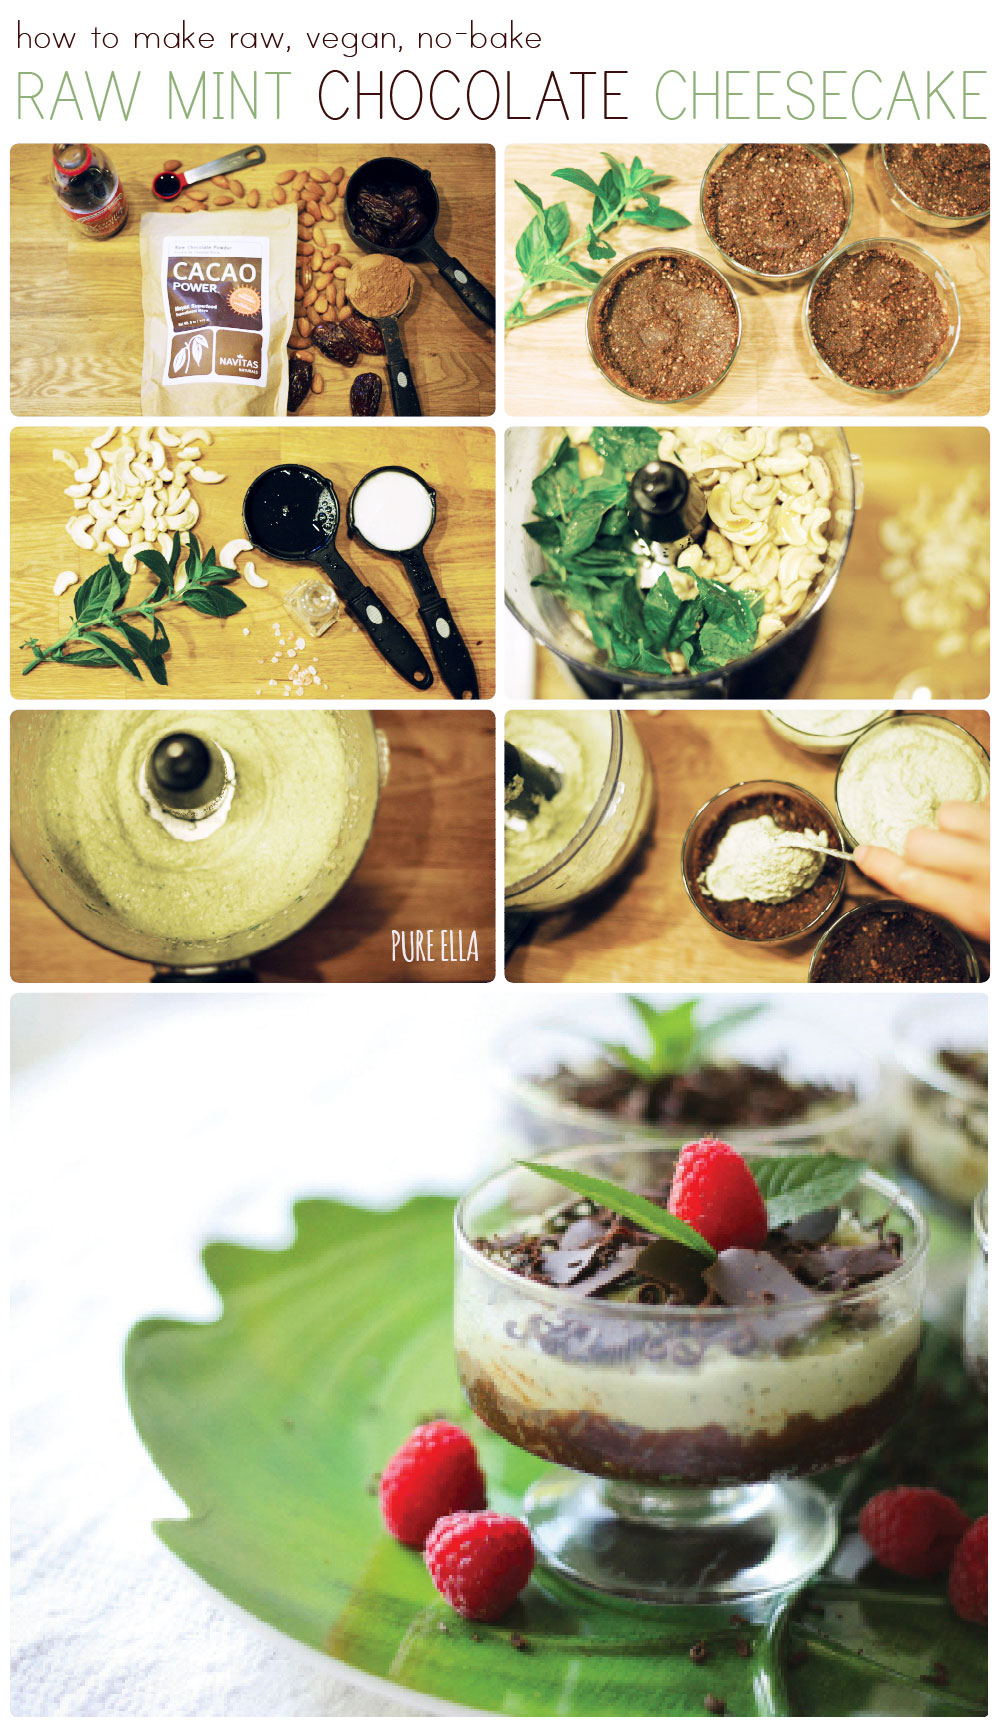
Raw Chocolate Crust Ingredients :
- 1 cup almonds, ground
- 3/4 cup pitted, packed dates
- 1/4 cup cacao powder
- 1 teaspoon pure vanilla extract
Ground the almonds in the food processor, add the other ingredients and 1-2 teaspoons of water if needed and mix to combine well. Press ‘dough’ to see if it sticks together a little.
Spread out evenly into little dishes, that are freezer safe and press evenly into the bottom of each dish. I made six in mine – but they were quite big for a single serving – they ended up being ‘shared’ between a couple ;) So because you’re doing individual portions, keep the size of your dishes in mind – smaller is best. (portion control is easier! ;)
Raw Vegan Cheesecake Mint Filling Ingredients :
- 2 1/2 cups cashews
- 1 cup lightly packed mint leaves
- 1 cup water
- 1/3 cup + 2 tablespoons coconut nectar or honey
- 5-8 drops mint essential oil, or to taste
- 1 teaspoon pure vanilla extract
- Pinch of Himalayan salt
- 3 tablespoons coconut oil, warmed slightly so it’s liquid
Directions :
In a blender or food processor, combine all the ingredients and mix to combine well. Taste the filling and add more mint essential oil if you want a bigger burst of mint – 1 drop at a time. Pour into the dishes with the crust and spread evenly.
Because you’re working with glass, refrigerate for about 1-2 hours, then place in the freezer for another 1-2 hours. Before serving, place them back in the fridge for 15 minutes or so, so they thaw out. We loved them a bit ice-creamy still!
The reason you wouldn’t want to place them directly into the freezer is so that the glass has a chance to slowly cool and then thaw back down – drastic changes of temperature for glass could result the glass to break.
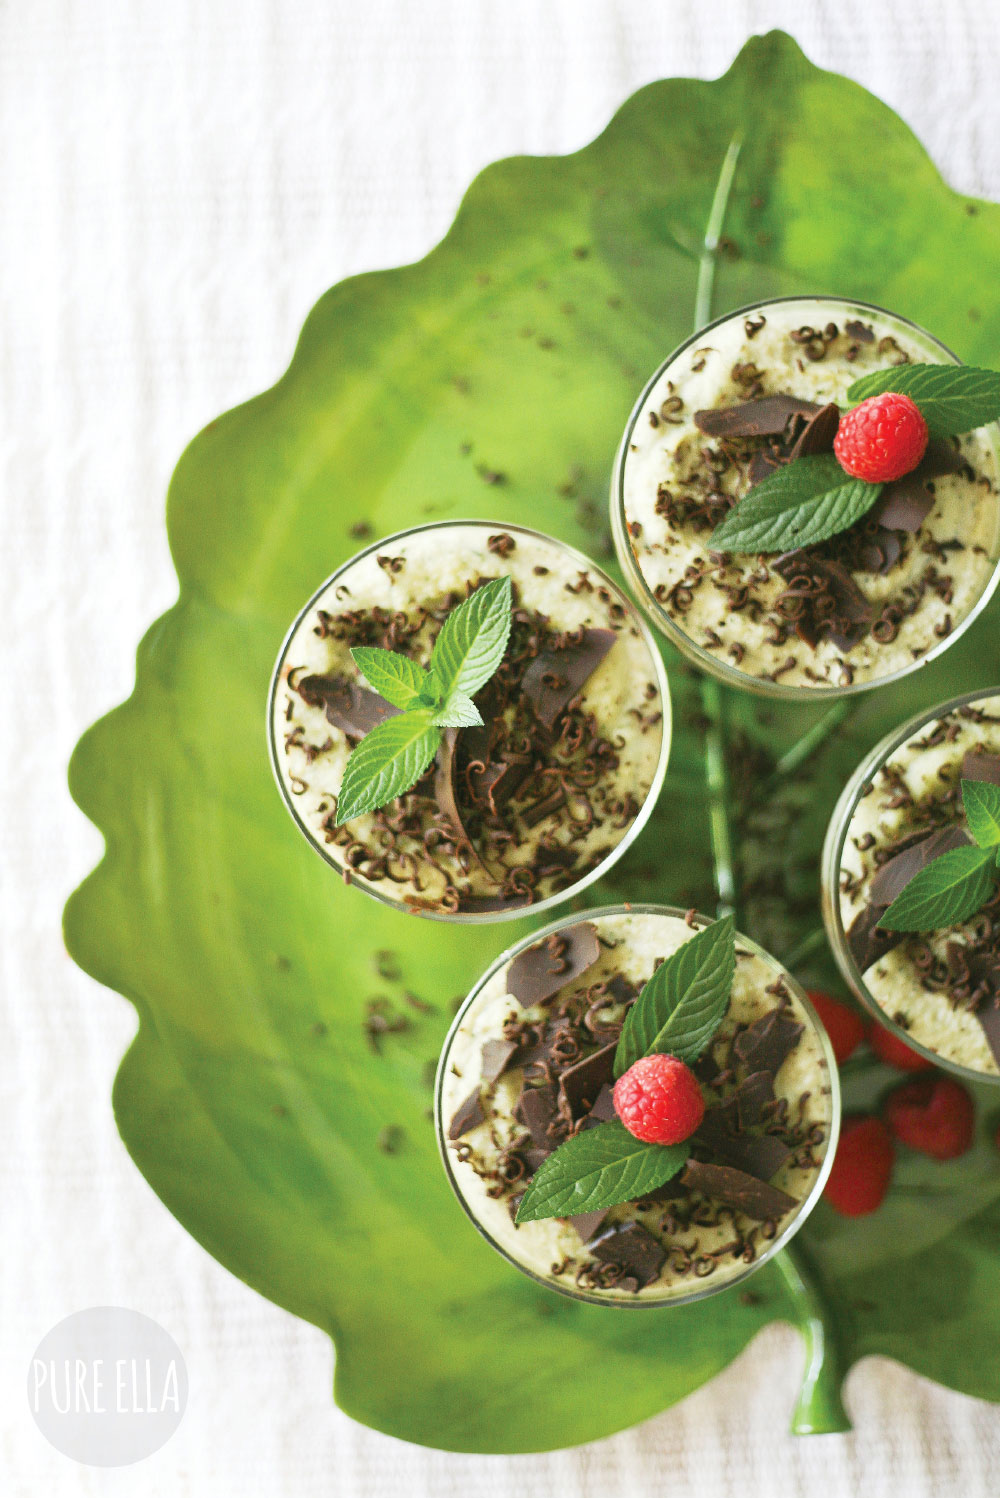
These are super cute in glass dishes – and very presentable when dressed up with extra sprigs of mint and even fresh raspberries – these were also picked fresh from our garden by the kids just before we served them ;) You could also serve them in plastic dishes (clear-plastic would be great for outdoor entertaining) or use a spring form and make it a tart!
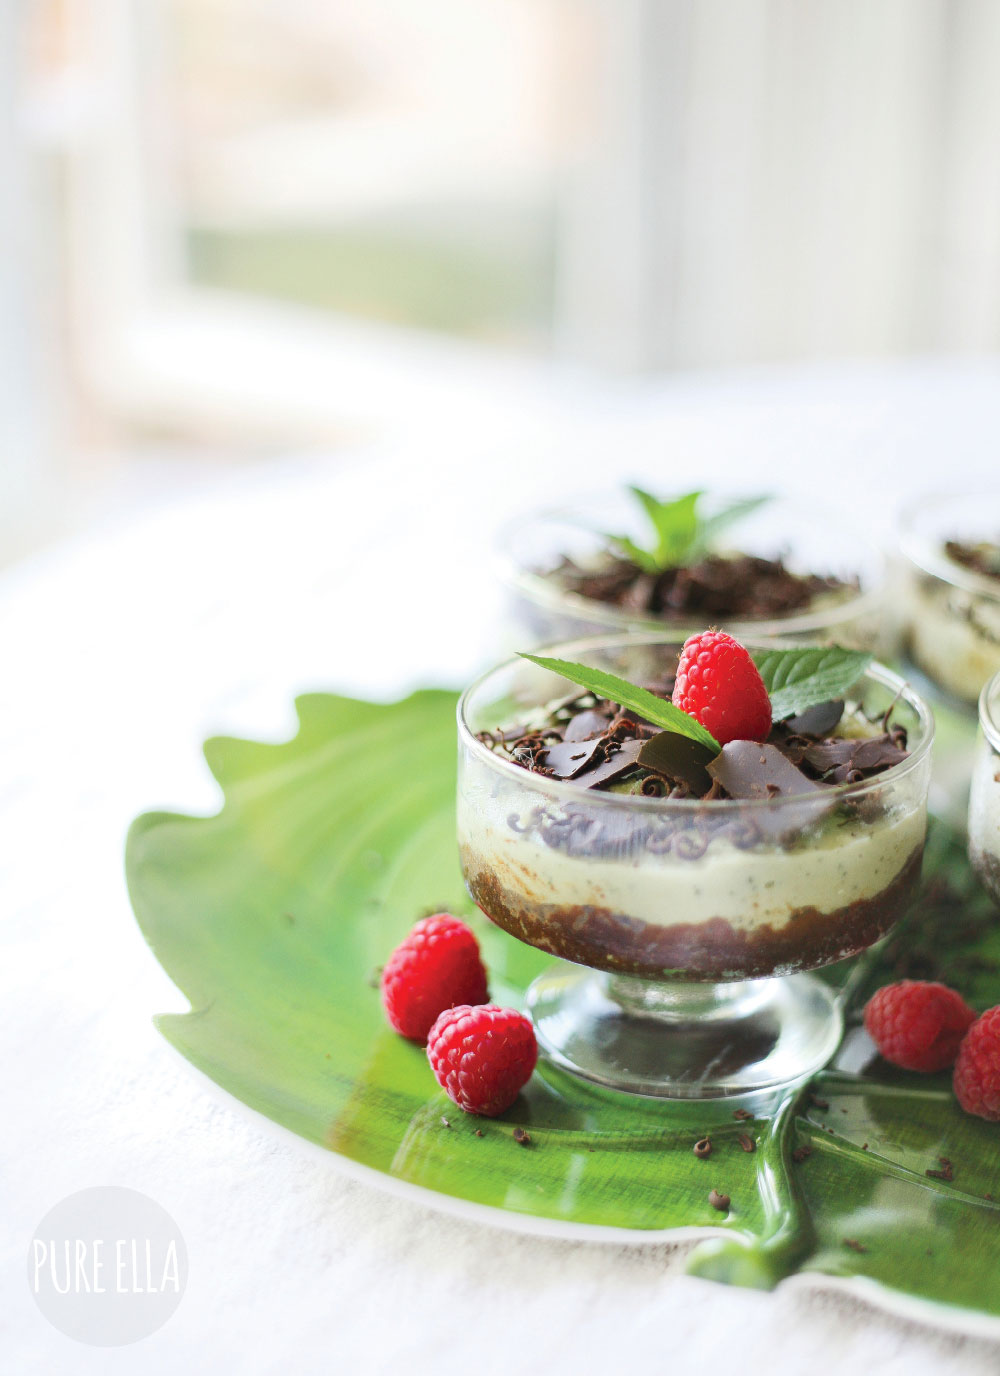
Oh dear… these were good! I am super excited that it was made with fresh mint from my herb garden ;) ps. it’s good to note that these were also enjoyed by all the grownups at our garden party ~ not so popular with the little kids! I think they are used to the sweet chocolate-mint ice cream flavour and associated the flavour with that – so they expected something different. But the grown-ups fought over them – seriously! ;)


WOW these are lovely! What a treat to use up fresh mint – amazing ; )
OMG These look delish Ella! Such cute presentation as always. I havent made anything mint yet this summer. I need to get on that.
Oh yum! I don;t weather I am drooling first over the pictures or the ingredients! Can’t wait to whip this up, I will be featuring this recipe this week on AFW, thank you!
oops, spelled ‘whether’ wrong! Typing is NOT my strong suit!
Your recipes are so inspiring, Ella. And your pictures are just gorgeous. I’m swooning over these. WOW!!
Hugs,
–Amber
These parfaits are out of this world! Wow-thank you for sharing this incredible recipe on Allergy-Free Wednesdays.
thrilled to realize I actually have all the ingredients for this! (especially a garden where the mint is taking over everything else!)
beautifully styled photos, by the way.
Are the cashews soaked beforehand? YUM!!!
Yes, about an hour in the refrigerator or overnight. But I found that even 20 minutes at room temperature softens them quickly enough. Just make sure they are raw ;) Enjoy
Hey Lady,
LOOOOOVE the new site. Simply Gorgeous!!!!
And this dessert looks amazing. So beautiful and fresh. You inspire me so!
xo,
–Amber
can you make this without cashews? looks delicious, but I can’t eat nuts!
Hi Zoe,
Thanks for visiting and for your question…
So there’s actually two types of nuts in this recipe; there’s the cashews that make up the cheesecake layer and there’s almonds in the crust.
You can replace the cashews with firm tofu for a vegan/ non-dairy version, keep the measurements the same and it works quite well in other recipes as an alternative to cashews. (although I have not tried it in this recipe). Blend it the same way you would the cashews in the food processor.
As for the almonds in the crust, you can experiment with a 1/2 mix of sunflower seeds and oats for example or buckwheat groats would also work. If you use a neutral tasting ingredient it will bind well with the help of the dates and work great. You just don’t want to overpower the mint flavour in the cheesecake.
I have not tested this recipe however with these options – but feel free to adjust to your liking, these alternative options do replace nuts in other recipes quite well so I do feel it will work out great for you ;)
I would love to hear from you how it works out for you with different ingredients ;) Hope to hear from you soon! ;) xoxo ella