So, as you already know from last Friday’s announcement, I have been attempting to make sourdough bread. I am on a yeast free diet since about 6 months, and I started to get bored with the yeast-free breads by our local bakeries and grocery stores. Everyone knows that the best and largest selection lies in the yeast breads… What do do??? Inspired by my oldest sister, who unfortunately lives in Europe (and therefore couldn’t closely guide me along the way), I though of attempting my own mere skills at bread baking. (Just a reminder, that I’m no baker, I try and have fun, but I am not a skilled baker at all.) So the point is, if I can do it – anyone can!
Let’s sift through right to the steps involved. As an excellent source, I used this guide Sourdough Baking to help me with the steps and the recipe.
 The starter, is a simple mix of flour with warm water. For the flour, you can use several different kinds; wheat, whole wheat, rye, spelt, just to name a few. For my started, I used a combination of rye and spelt flours (because I did want to avoid wheat). Here are some points to consider:
- use a clean glass, wide mouthed jar or bowl
- mix in a few spoons of flour and water
- the starter will be ready to use within 4 days
- after the first day, you can keep it in the fridge and take our for about an hour each day, to feed it (explanation below)
Yes, it will take about 4 days for you starter to ferment properly. So if you feel like having some sourdough tonight for supper than it will not happen (unless you can get your hands on an already prepared/ proofed starter ;)

Your starter will become sort of a pet for you ;D You need to take care of it daily and feed it so it will grow. What the feeding is, is essentially adding more flour and warm water to it, leaving it for about 1 hour out in room temperature. It’s pretty simple stuff, and it really doesn’t take long to just add a bit of flour and water and give it a stir. You kind of get attached to it anyway, so the process will be fun, eventually if you like it – you will never have to make the starter from scratch again as it will turn into a sponge form, and every time you make a fresh batch, you will reserve some of that sponge for your next bread.

As I started saying before – I am not a skilled baker – I do try however, and I guess it’s good to know that perseverance pays off. Yes, it took me 3 tries to get this bread done. Here were my first 2 mistakes:
- I used millet flour only. Millet flour isn’t great for bread. Period. It’s a nice grain to use as an add on but as the main ingredient, it didn’t work well. The bread came out very crumbly and I didn’t like the taste of it at all. If anyone did have success with this flour, please let me know your secrets. For beginners, like myself, I don’t recommend it.
- For my second try, I admit I enjoyed the rising process of it, and though the more I let it sit at room temperature, the more it will rise – well that wasn’t a good idea. The bread came out too SOURdoughy, too bitter and just gross.

This is the actual recipe that I ended up working with.
- 2 Cups of sponge (proofed starter)
- 2 cups of spelt flour
- 1 cup of rye flour (or whole wheat)
- 1/2 cup of spelt flakes (germ)
- 2 tablespoons of olive oil
- 4 teaspoons of sugar
- 2 teaspoons of salt
Some other tips: bake at 350C for about 30 minutes in an un-preheated oven.
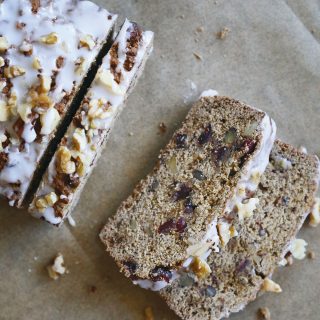
Overall, it was a fun experience. I learned a lot about the basics of baking and how just flour + water gives you an all natural yeast. As you may have figured, I have some sponge left over in the fridge right now, so this will be a new tradition of home baked bread in our kitchen. The possibilities are endless, all the flours, seeds, nuts, dried fruit or savoury garlic and onion, WOW – this is a start of something new, wholesome and satisfying. For this one, I served it spread with a vegan margarine (or use butter) and fenugreek sprouts on top (see here how I make them at home). Yum!

I invite everyone go give this a try and see where this experience will take you. If you’ve tried to make sourdough bread before, please do share how your experience went, maybe you can share some secrets and tips ;P




It looks great. Well done ;D
yum. you insist that it’s so easy… maybe I will try it.
Thanks for sharing. Yours sure looks good.
Well, it looks good and I was so excited to try it… then I saw I had to wait FOUR days for the starter.
Then I got sad.
What a beautiful process. And your pictures were lovely. I wanted a warm slice of bread with butter so badly, yum. If you ever want to pay me a visit in UT, you can stay free of charge in exchange for homemade bread ;)
Your blog is like candy for the eyes! That bread looks tasty. I’m gonna go look around your site now!
xoxo
Just a little note one this recipe.
I no longer eat wheat flour, so if you don’t either, I would recommend using rye flour to replace the wheat.
I am craving this bread again ;) yummm